Warning: This article describes configuration for legacy ready-made views. Those views have been replaced with modern, easy-to-configure analogues and we strongly recommend using them instead.
See the version of the article for newest views.
AddSearch provides you the Widget and the Separate Results Page Views for easy implementation. For developers, we provide the search API. Visit our documentation on Different Search Results Views for more information.
The simplest way to install AddSearch is to copy a single line of code to your site template.
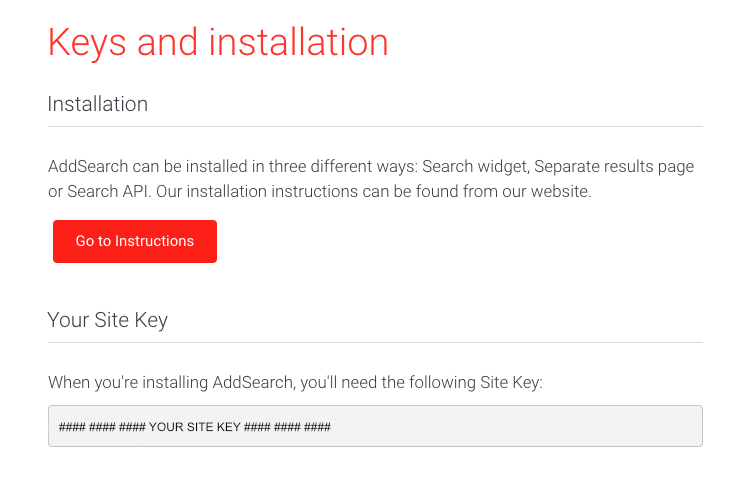
For installing AddSearch, you need an AddSearch account that comes with a public sitekey. It is used to identify your search index and return search results from your search index.
These are instructions on how to install ready-made search views on your website.
These instructions can be used to install AddSearch on basically any content management systems, including Squarespace, Webflow, WebEx, Drupal, and Joomla.
Widget view
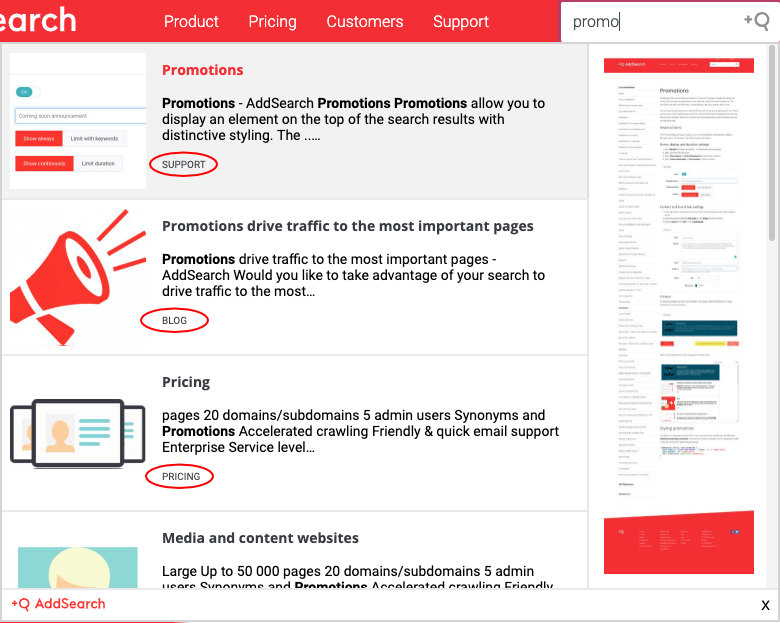
Default results view: Widget
Quick Method
Our default results view, the search widget view, can be seen on the top right corner of this page. To install AddSearch on your site as a search widget, follow these instructions:
Access the design template of your site. If you’re using a content management system, this template will reside in a menu called “Theme”, “Template”, “Design”, “Appearance” or similar. For WordPress sites, the templates reside in Appearance -> Editor.
If you have an existing search on your site: Go to site template edit and find your site’s search form. This is a HTML element that starts with a <form> tag, such as <form id="search">. Once you’ve found the relevant <form> tag, delete it, and everything up to and including the closing </form> tag.
Copy the JavaScript code below (and replace #### with your Site Key) to where ever you want the AddSearch field to appear:
Save the changes to your template and publish them to your website.
When using the Quick Method above, the AddSearch script inserts a single search field into the site. The look & feel of the search field can then be customized via the AddSearch Dashboard.
Advanced Method
If you want to have multiple search widgets on one page, or use your own input field with special styles, use the Advanced Method described below.
When using the advanced method, the CSS for the search field in the Dashboard > Settings> “Look & Feel” customization will not be applied. You need to define the CSS for the search field on your site’s style sheets.
Access the design template of your site. If you’re using a content management system, this template will reside in a menu called “Theme”, “Template”, “Design”, “Appearance” or similar. For WordPress sites, the templates reside in Appearance -> Editor.
Insert one or more <input type="text" class="addsearch" disabled="disabled" /> elements where you want your search fields to reside. You can define multiple CSS class names to your input fields, but make sure that addsearch class is one of them.
Copy the below JavaScript code (and replace #### with your Site Key) to the bottom of your page, before the closing </body> tag, but after the <input type...> element from the previous step.
Save the changes to your template and publish them to your website.
Separate results page
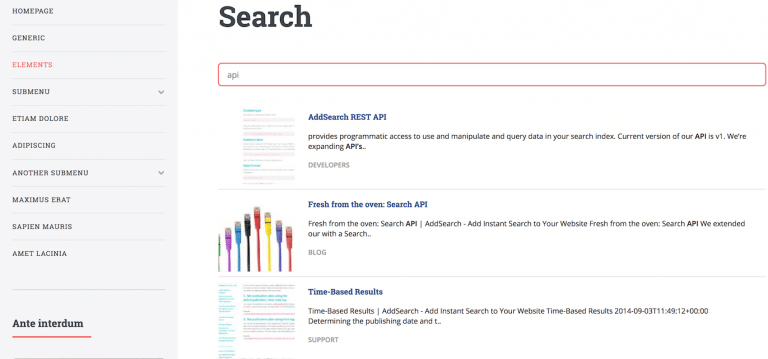
Example of a traditional separate results page
If you want to show your search results on a traditional results page, follow these instructions. An example website with a separate results page can be found from this link.
Search field
The search field you need to add to your website template is a simple HTML form with one text field. The form is submitted to the results page, which you need to create as well. The form’s action parameter needs to match your results page’s URL. In this example the URL is “/search.html”:
<!-- Form's action must be the results page's URL -->

<form method="get" action="/search.html">
  <!-- Search field's name must be addsearch -->
  <input type="text" name="addsearch" placeholder="Search" />
</form>
Results page
Results page needs to have at least two elements: Div where the results are rendered and the AddSearch JavaScript below the div. You can also show a search field above search results with an input field:
<!-- Show a search field above results as well (optional) -->
<input type="text" class="addsearch" placeholder="Search.." />

<!-- Search results will be rendered to this div -->

<div id="addsearch-results"></div>

<!-- Script must be below search field and addsearch-results div -->
<script src="https://addsearch.com/js/?key=####&type=resultpage"></script>
Separate Results Page with Widget
You can combine the Separate Results Page view with the AddSearch Widget. When you type your search term, results are displayed instantly in the Widget. If you press enter, you will be forwarded to a separate results page.
To implement the Separate Results Page with Widget, follow these instructions.
Widget
The widget part can be added to every page of your website. It consists of the search field and the script snippet with settings. The search field is a simple HTML form with one text field. The form is submitted to the results page, which you need to create. The form’s action parameter needs to match your results page’s URL. In this example, the URL is “/search.html”.
<!-- Form's action must be the results page's URL -->
<form method="get" action="/search.html">
  <!-- Search field's name and class must be addsearch -->
  <input type="text" name="addsearch" class="addsearch" placeholder="Search" />
</form>
By default our script overrides onsubmit event for the search input field so you need to allow it with a setting. Don’t forget to add the installation script with your sitekey as well.
<!-- Allow submitting the form with a search query -->
<script>
   window.addsearch_settings = {
       allow_parent_form_submit: true
   }
</script>
<!-- Script must be below the search field and AddSearch settings -->
<script src="https://addsearch.com/js/?key=####"></script>
In case your CMS doesn’t allow adding forms, you can specify the results page URL with the following setting:
<!-- Show a search field above results as well (optional) -->
<input type="text" placeholder="Search..." id="serp-search" data-addsearch-serp-field="true" />
<!-- Search results will be rendered to this div -->
<div id="addsearch-serp-results"></div>

<!-- Define settings for separate results page and the placeholder text -->
<script>
   window.addsearch_settings = {
       serp_url: '/search.html',
       placeholder : "Search..."
     }
</script>

<!-- Script must be below search field and addsearch-results div -->
<script src="https://addsearch.com/js/?key=####&type=serp"></script>
You can call the same functions as for the Separate results page using addsearchSERP variable, for example:
By default, AddSearch scripts don’t use caching. This allows seeing any changes in the search results appearance that you make in the dashboard’s “Settings for Widget and Separate Results Page views” section reflected immediately.
When you are happy with the way your search looks like, you might want to set the cacheTtlSeconds parameter in your script snippet. The value of this parameter defines how long the script will be cached in your website’s visitors browser and it reduces the page load time on second and following views. Here is an example of the parameter usage:
The cacheTtlSeconds parameter can be used with any type of installation mentioned above.
Advanced settings
It’s possible to adjust Separate results page’s functionality with advanced settings. For example, you are able to display the target page’s URL in search results. For instructions see this page.
If you want to restrict the search to certain pages, you can do so by using category filters. You can configure the search script to limit its results to pages that for example have a certain domain or first path segment.
Was this helpful?
Let us know if you liked the post. That’s the only way we can improve.